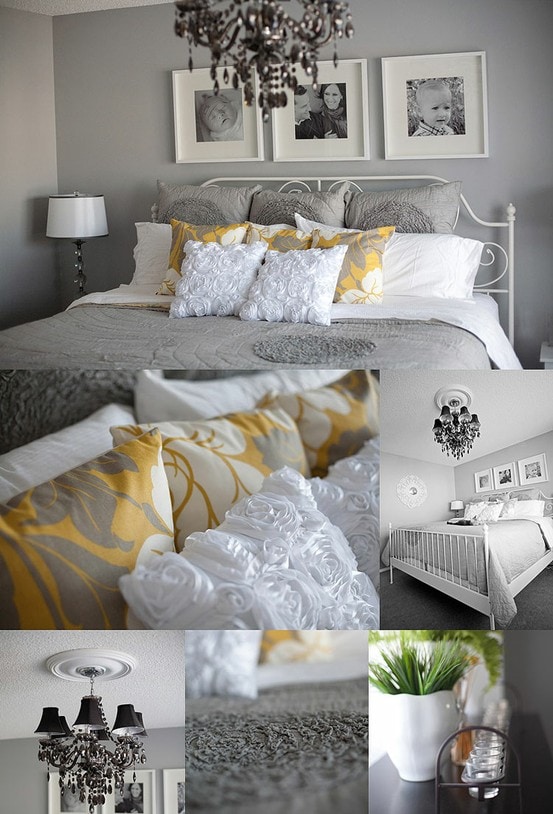
I had wanted to change our bedroom around for a while but other projects trumped this one. So in December of last year about a week before Christmas I decided to tackle our bedroom. Of coarse again I failed to take before pictures, but I will describe it. It had beige walls and dark brown decorations. The curtains and bed spread were matching teal, brown, and cream. I loved the bed-set, Mike had got it for me for my birthday a couple years ago. I had decided to go for a elegant look. This link below was my inspiration from pinterest. http://www.twopeasandtheirpod.com/wp-content/uploads/2011/09/grey-bedroom.jpg?9d7bd4
I had the hardest time finding a chandelier that I LOVED, I must had sent Sarah and Ashley a million pictures. One we bought off of amazon.com had pieces missing actually they were never missing it was a typical "man thing" Mike failed to look in the actual box. I had already made the long return phone call and printed the return label when I found the pieces so back it went lol was not funny at the time. So after weeks for searching, Lowes is where I found one, I wasn't sure at first but after it was hung I love it!
 |
| Chandelier |
We painted the walls a gray but with the light on it grabs the purple from the bed set which I found at Kohls.com of coarse on sale, 30% off coupon, and kohls cash (awesome deal) so the walls look like a light purple.
 |
| Wedding Pictures |
 |
| Bedspread |
Above our bed is three of my favorite wedding pictures one black/white, one sepia, and not sure the proper photographer color name for the third. Above the pictures I hung some word decals that say "A love story never ends."
Next is curtain time I fell in love with these the second I saw them on amazon.com they reminded me of my wedding dress...I was hesitant to buy at price because of the price but Sarah talked me into it..
 |
| Wedding Curtains |
I almost forgot we MADE our headboard, it was a relatively easy project. It started as a piece of plywood, clearance fabric, padding, buy1get1 buttons all from Jo-Ann Fabric's, and we already owned a stable gun. About an hour or so later Mike and I had a finished headboard!
 |
| Do it yourself Headboard |
Next to our bed is a shabby chic night stand form amazon.com (I love AMAZON) it was the easiest table ever to put together 3 pieces and pretty sturdy. On this night stand was a beautiful purple orchid, I love orchids my second favorite flower next to tulips but I have been called the orchid killer, I can not keep them alive for my life so as you see it is gone :(
In the picture below you also see that our bed skirt does not match we have a sleep number bed that inclines and sits up and that skirt costs us a pretty penny unfortunately we matched it to our old set so it stays.
 |
| Nightstand |
Here is a mirror that I got on a spa weekend getaway with my mom in Hartville, Ohio we found it at a antique shop for next to nothing. Mike sanded it and painted it white for me, yes I am spoiled!
 |
| Antique Mirror |
Last is a couple walls I wasn't really sure what to do with them, one has a clock my mom had engraved with our wedding date. Don't mind my bath robe in the picture..
The last wall will be pictures of our little people, you will notice only Addie's is up, I am waiting for wallgreens.com/photo to have a free 8x10 special. I now have a bedroom I enjoy hanging out in.
 |
| Wedding Clock |
There is our finished master bedroom!
 |
| Little People |
I may add one thing I have a chest my Grandpa made me we may sand it and paint it white or black and put at the bottom of our bed and use as a storage bench, I will update post when that is finished. Thanks for reading, feedback and ideas/comments are always welcomed and appreciated!


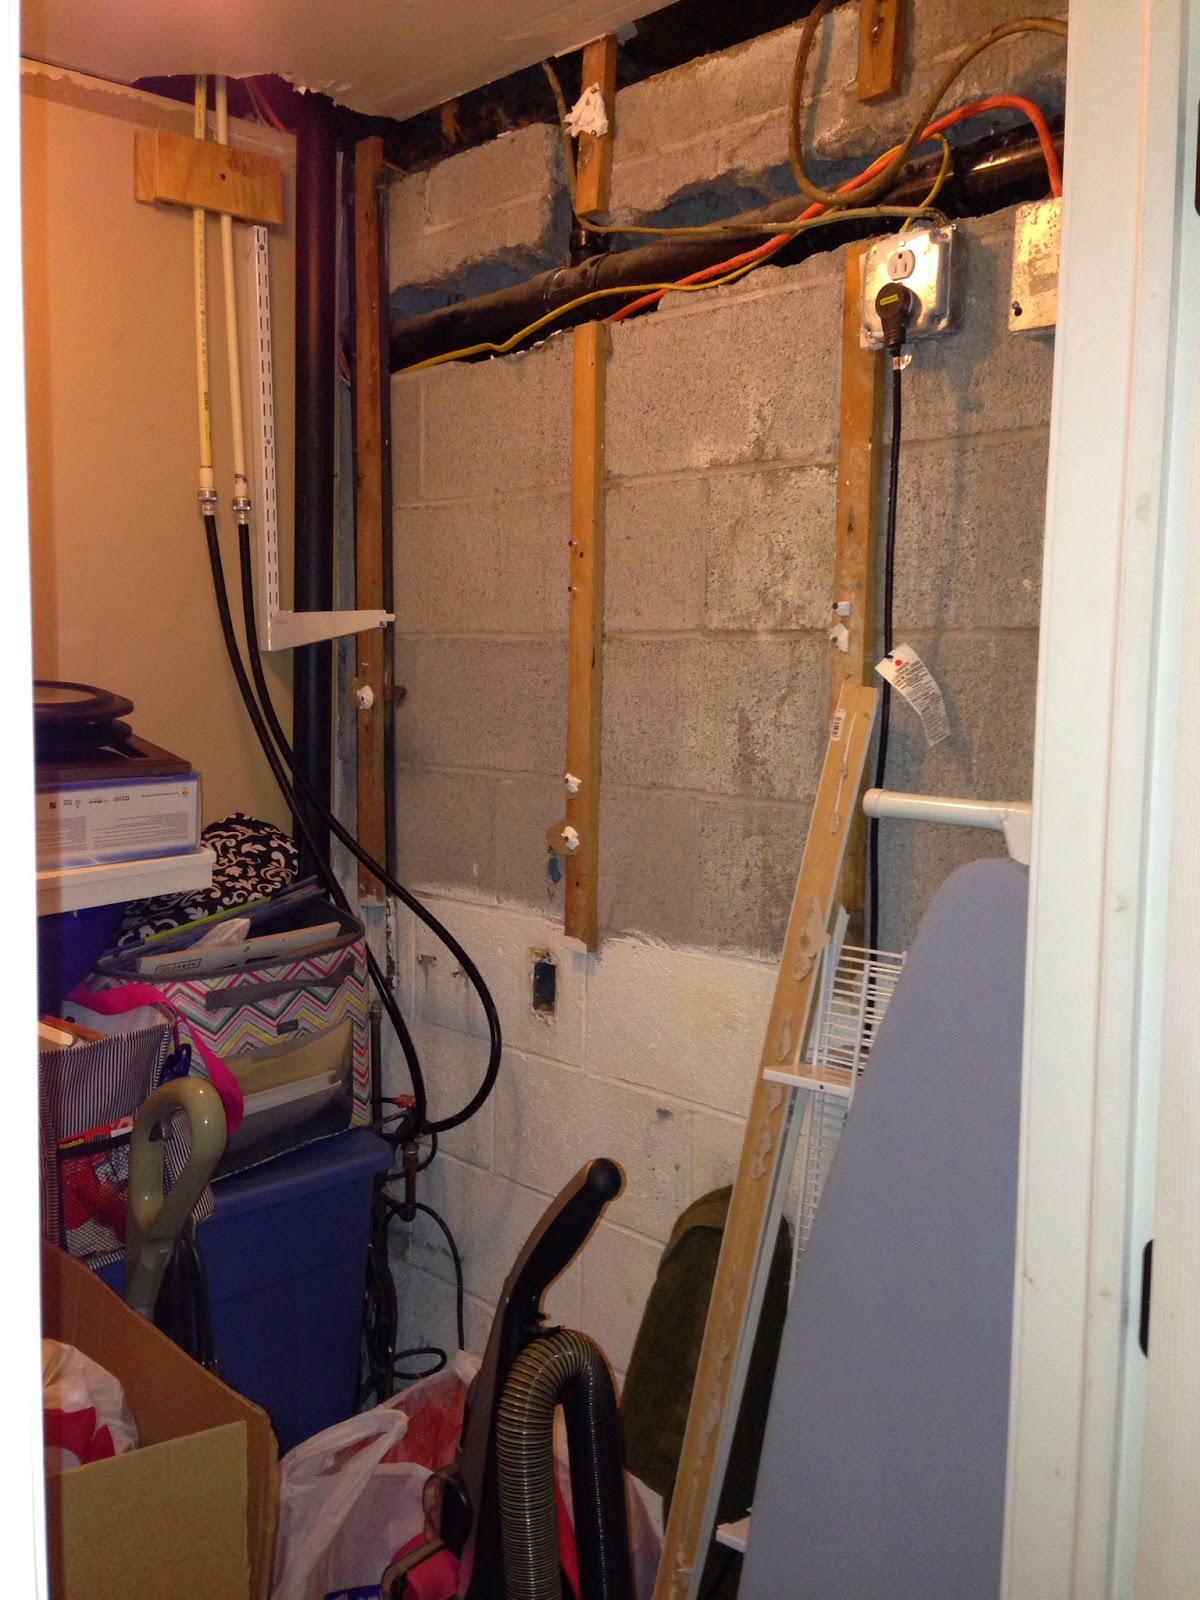

 Here is it being painted and the other picture shows the plywood for the walls and the ceiling. You can see in the last picture we had to enclose the plumbing that runs up to the washer and dryer when I came home and say that I will admit I was upset I didn't realize it was going to take up so much space and I am pretty sure Mike was annoyed actually I know he was annoyed with my reaction. It took me a few minutes about 20 and I got over it (one of those not seeing eye to eye moments with your husband).
 The hardest part of projects for me is the mess during the projects. Who else organizes during construction?? Hurry up paint DRY so we can install shelves and coat rack! Okay a couple days later the paint is completely dry and trim is up.


 Coat racks and shelves are up...

 Now that I have all my bins full and organized it was time to label. I bought some nice identa-labels. I went online to upload the free template to type my labels due to my messy hand writing. My computer decided it would not open the download..annoying!


